
How to make coffee with a drip filter: a professional guide
Drip filter is one of the most popular and versatile coffee brewing methods in the world. This method allows you to obtain a smooth, balanced coffee taste with bright aromas and a particularly pleasant coffee drinking experience. Drip filter ideally reveals the properties of coffee beans and is perfect for everyday coffee brewing at home.
The history of drip coffee making
The drip coffee brewing method originated in 19th century France. The first drip coffee makers were created to simplify the coffee brewing process in households. The method quickly spread throughout Europe and later to America, where it became particularly popular due to its simplicity and consistency.
Modern pour-over methods like the V60, Kalita Wave, and others are an evolution of drip coffee brewing. These methods allow the coffee master to precisely control every aspect of the brewing process, from water temperature to pour speed.
Required inventory and ingredients
Inventory:
- Drip coffee maker (V60, Kalita Wave or similar)
- Paper filters
- Coffee grinder
- Electronic scales
- Thermometer or temperature control kettle
- Timer
- Gooseneck teapot (pouring)
Ingredients for a 200 ml serving:
- 12 grams high quality coffee beans
- 200 ml filtered water
- Additional water for filter rinsing
Steps for making drip filter coffee
1. Preparing ingredients and inventory

Accurately measure 12 g of high-quality coffee beans in 200 ml of water. Use electronic scales - an accurate ratio of 1:16.7 is the most important factor for a successful result. Prepare all the equipment: filters, thermometer, timer and gooseneck pot for pouring water.
Professional advice: The ideal coffee to water ratio for drip coffee is 1:15 to 1:17. For a stronger coffee, use 1:15, for a milder one, use 1:17.
2. Grinding coffee beans
Grind the coffee beans to a medium coarseness (0.7-0.8 mm particle size). The grind size should resemble coarse sea salt or fine sugar. Proper grinding ensures optimal interaction between water and coffee – not too fast, not too slow extraction.
Important: Grind your coffee just before brewing – the aroma and taste of freshly ground coffee are unparalleled. If the coffee is ground too fine, the coffee will be bitter; if it is ground too coarse, the coffee will be watery and sour.
3. Preparing the filter and container

Place a cup, glass or coffee pot under the drip coffee maker. Make sure the container is large enough and can retain heat. It is ideal to use ceramic or glass containers, which do not alter the taste of the coffee.
4. Filter rinsing
Insert a quality paper filter into your drip device. Fill it with hot water (92-96°C) to remove the paper smell and keep the device warm. This step is especially important - unrinsed filters can give your coffee an unpleasant papery taste.
After rinsing, pour the water out of the cup and leave the filter in the drip device.
5. Coffee rash and blooming

Add the ground coffee to the rinsed filter and shake gently to distribute the coffee evenly. Place everything on the scale and start the timer.
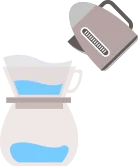
Start pouring water at 92–95°C in slow, circular motions from the center to the edge. For the first blooming stage (0:00-0:30), pour twice as much water as coffee – about 25 ml.
6. Basic water pouring
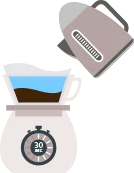
After the 30 second blooming phase, continue adding water in small amounts (20-30 ml at a time), maintaining a constant water level in the filter. Add in circular motions, avoiding touching the edge of the filter to avoid uneven extraction.
Pouring schedule: 0:30 – 50ml, 1:00 – 100ml, 1:30 – 150ml, 2:00 – 200ml (final amount).
7. Completion of the process

Wait until all the water has filtered through the coffee. The entire process should take 2:30-3:30 minutes. If the process takes longer, the coffee is ground too finely; if faster, it is ground too coarsely.
Remove the drip device and gently stir the coffee with a spoon to mix all the layers of aroma.
Professional tips for making drip coffee
- Water quality: Use filtered water with 150-300 ppm mineralization
- Temperature: The ideal water temperature is 92-95°C.
- Coffee freshness: Use coffee that was roasted no more than 2-4 weeks ago.
- Filters: You use original product filters for optimal results
- Grinding: Invest in a quality burr grinder for consistent grinding results
- Experimentation: Vary the grind size to find the flavor balance you like
Differences from other methods
Drip vs. Chemex: Drip coffee uses thinner filters than Chemex, resulting in a thicker consistency with more pronounced oily flavor nuances. Chemex filters remove more oils, resulting in a smoother coffee.
Drip vs. French Press: The drip method produces a cleaner, more distinct flavor profile because the paper filter removes coffee dust and most of the oils. French Press coffee is thicker and hungrier.
Troubleshooting
Coffee too bitter: Reduce the grind size or water temperature. The coffee may be being extracted too long.
Coffee is too acidic: Increase the grinding fineness or water temperature. The coffee is not being extracted sufficiently.
Coffee is weak: Increase the amount of coffee or reduce the amount of water.
Process too long/short: Adjust the grind size – finer for a slower process, coarser for a faster one.
What coffee to choose for the drip brewing method
The drip method perfectly reveals the characteristics of medium roast coffee. Recommended Lapino Roastery coffee types:
- Colombia: Soft, with caramel and chocolate chips
- Supreme: Balanced coffee with nutty aromas
- Fruity: Lively coffee with fruity aromas
- Brazil: Classic coffee flavor with chocolate nuances
Conclusion
The drip coffee brewing method is a great choice for both beginners and experienced coffee lovers. This method reveals the authentic taste and aroma of coffee beans, and allows you to experiment with different brewing parameters. With care and practice, the drip method will become part of your daily coffee brewing ritual.
Be patient and experiment – the optimal parameters for each type of coffee may vary. The key is consistency and using quality ingredients.